Checkpoints
Checkpoints
What is a checkpoint?
A checkpoint is a pose or a command you set up on your exercise. You can create as many checkpoints as you want, and change the order of your exercise, even you can chain different checkpoints.
Creation
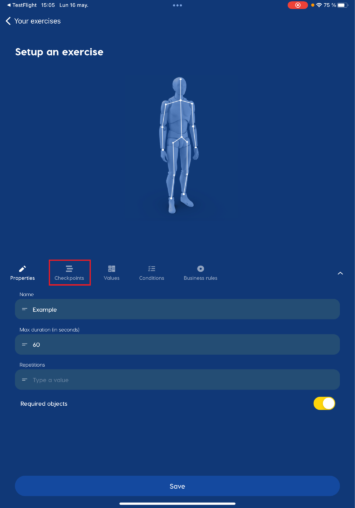
Step 1 | Chekpoints options
Select the checkpoints option, a list of the checkpoints included in your exercise will be displayed here.
Step 2 | Add new checkpoint
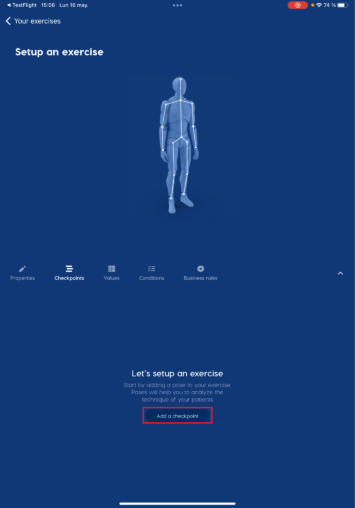
Go to the bottom of the list of checkpoints and select the ”add a checkpoint” option.
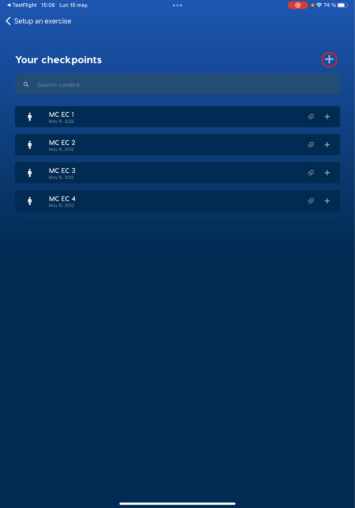
When this menu is displayed the checkpoints in the list are default checkpoints created by the system.
Select the button located in the upper right corner with the ”+” icon.
This are two types: Pose and Voice.
Pose checkpoints: Is created based on the comparisons, when the user achieves all the checkpoints comparisons, the app marks the checkpoint as made.
Voice checkpoints: It’s detected when the user say the words that you setup in the name.

Step 3 | Creating a pose checkpoints
You can now decide the body position you want for that checkpoint in three different ways.
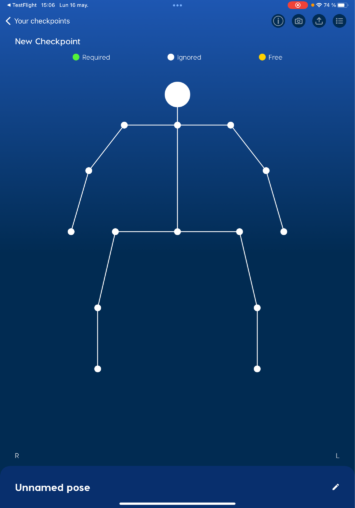
Manually
There are three states when you create a pose checkpoint.

When you tap any point the white points will turn yellow, meaning you have changed to the edition mode. Here you can create the pose you want.
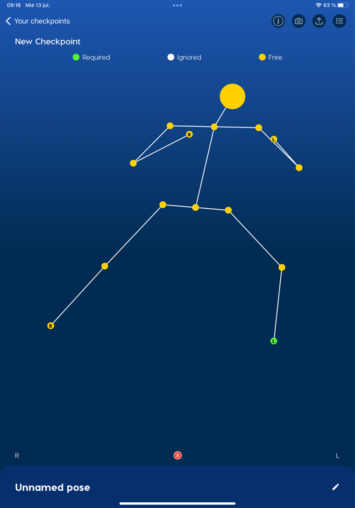
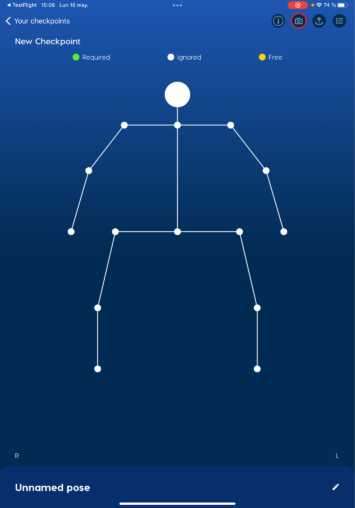
Taking a Photo
You can take a photo with the camera button at the top right in the “New checkpoint” menu.
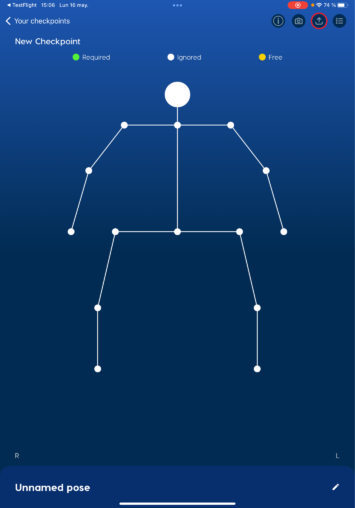
Uploading a Photo
You can select a photo from your gallery with the arrow-up button at the top right in the “New checkpoint” menu.
Comparisons
Comparison: The selection of 2 bodypoints to be compared. These are the available comparisons:
- Vertical distance: returns a measurable variable, a number in percentage, centimeters or meteres.
- Hotizontal distance: returns a measurable variable, a number in percentage, centimeters or meteres.
- Angle: Arctangent formula.
- Vertical comparison: returns if the bodypoint is above, below or equal to the other bodypoint of comparison.
- Horizontal comparison: returns if the body points is too left, too right or equal to the other bodypoint of comparison.
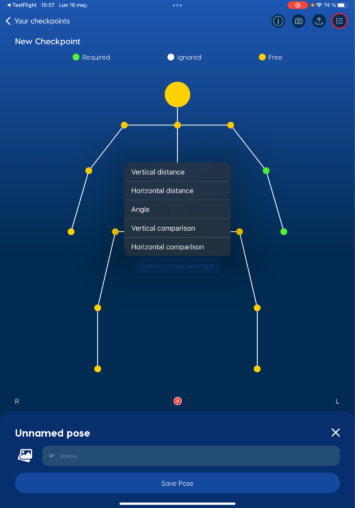
The comparisons determine the success of one pose, for creating one, you need to select two points by touching them. Next, a list will appear with the different options, select the one that match with the needed criteria.
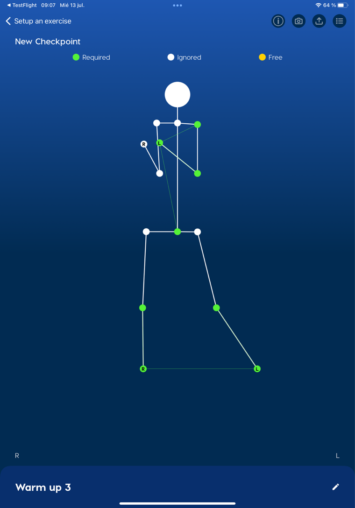
You can review the comparisons you’ve made on the upper right corner tapping the three line icon.

Also you can delete it by sliding to the left.

Step 4 | Name the checkpoint
Select the pencil-shaped icon placed in the lower right.
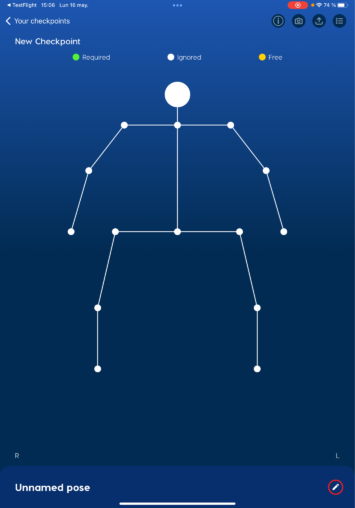
This will display a section where you can write the name of the checkpoint. Finally, click on the ”save pose” button.
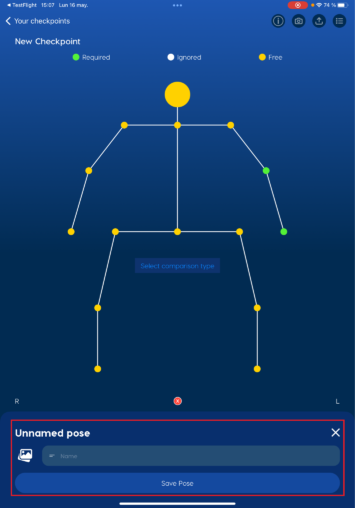
Step 5 | Add checkpoints to your Exercises
After you create a checkpoint, you need to add it to your drill. Select the button with the ”+” icon located at the end of the checkpoint you want to add.
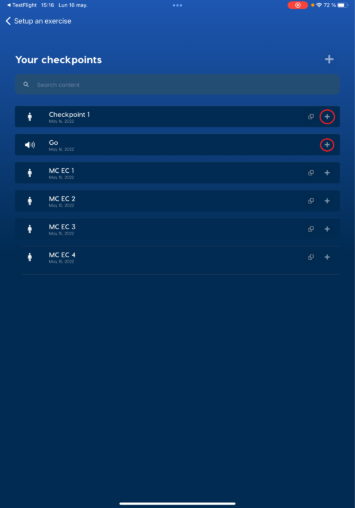
Then it will take you back to the checkpoint option menu with the checkpoint you recently added to your Exercise.
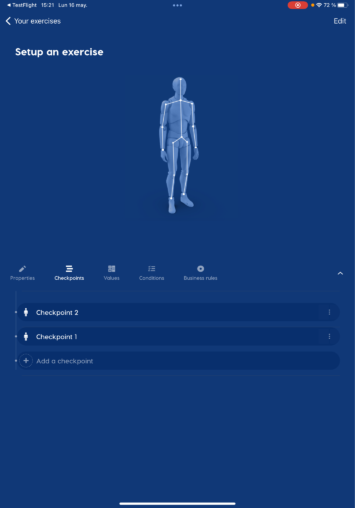
You can always add another checkpoint with the button “Add a checkpoint” at the end of the list.
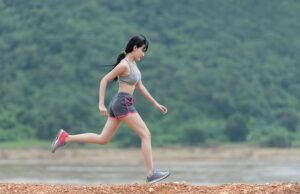
Next, there is a series of guide photos of what the photo you upload should be like in order to be detected correctly
Good Lighting
Adequate lighting is necessary to detect all points of the body in the desired position


One person in the photo
If there is more than one person in the photo, it will not be possible to detect which position is needed


Show face or profile
The person must be facing the camera or at least in profile


Show full body
If a body part is not displayed, the pose cannot be set correctly

